How to Delete Your Facebook Account: A Step-by-Step Guide
Facebook has become an integral part of many people’s lives, facilitating connections, sharing news, and networking. However, there may come a time when you want to take a break or permanently delete your Facebook account. Whether it’s for privacy concerns, a digital detox, or simply a shift in personal preference, we’ve crafted a detailed guide on how to delete your Facebook account smoothly and effectively.
Reasons for Deleting Your Facebook Account
Before diving into the steps, let’s explore why you might want to delete your Facebook account:
- Privacy Concerns: Facebook has faced criticism for its handling of user data. Many users choose to leave the platform to protect their privacy.
- Time Consumption: Social media can be addictive. Taking a break by deleting your account helps reclaim valuable time.
- Unwanted Content: The platform has faced issues with misinformation and negative content that users may want to distance themselves from.
- Mental Health: Studies have shown that too much social media can impact mental well-being, prompting users to leave.
- Changing Interests: Users may find themselves less interested in social media and prefer more direct, personal forms of communication.
How to Delete Your Facebook Account
Deleting your Facebook account can be done in a few simple steps. It’s important to note that you can choose to deactivate your account temporarily if you want to take a break without losing your data.
Step 1: Backup Your Data
Before deleting your account, consider downloading your information. This includes photos, posts, messages, and more.
- Log in to your Facebook account.
- Go to Settings (the arrow in the top-right corner).
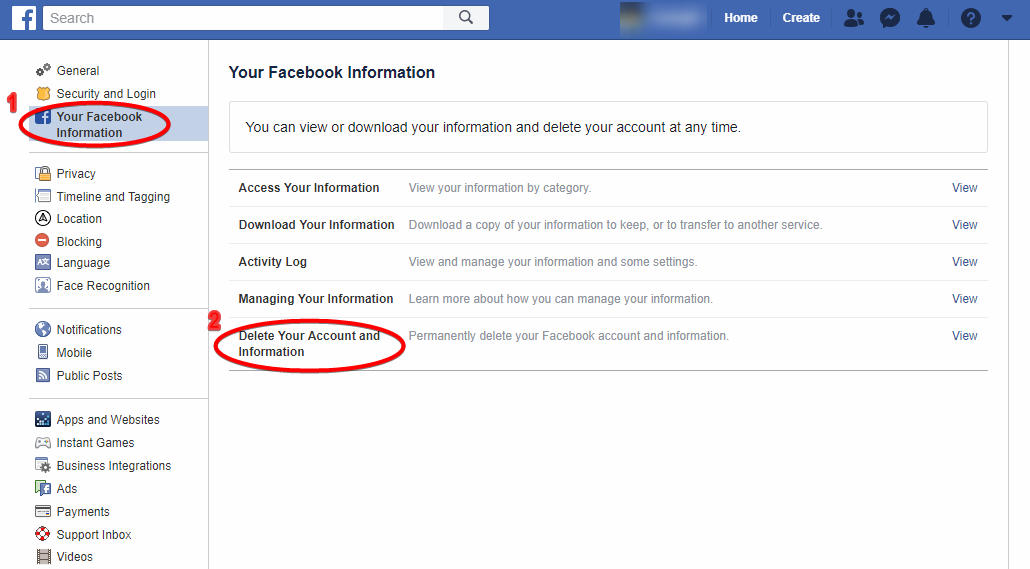
- Select Your Facebook Information from the left column.
- Click on Download Your Information.
- Select the data you want to save and click on Create File.
Step 2: Deleting Your Account
Once you’ve backed up your data, you can proceed with deleting your account:
- Go to Settings again.
- In the Security and Login section, look for Deactivation and Deletion.
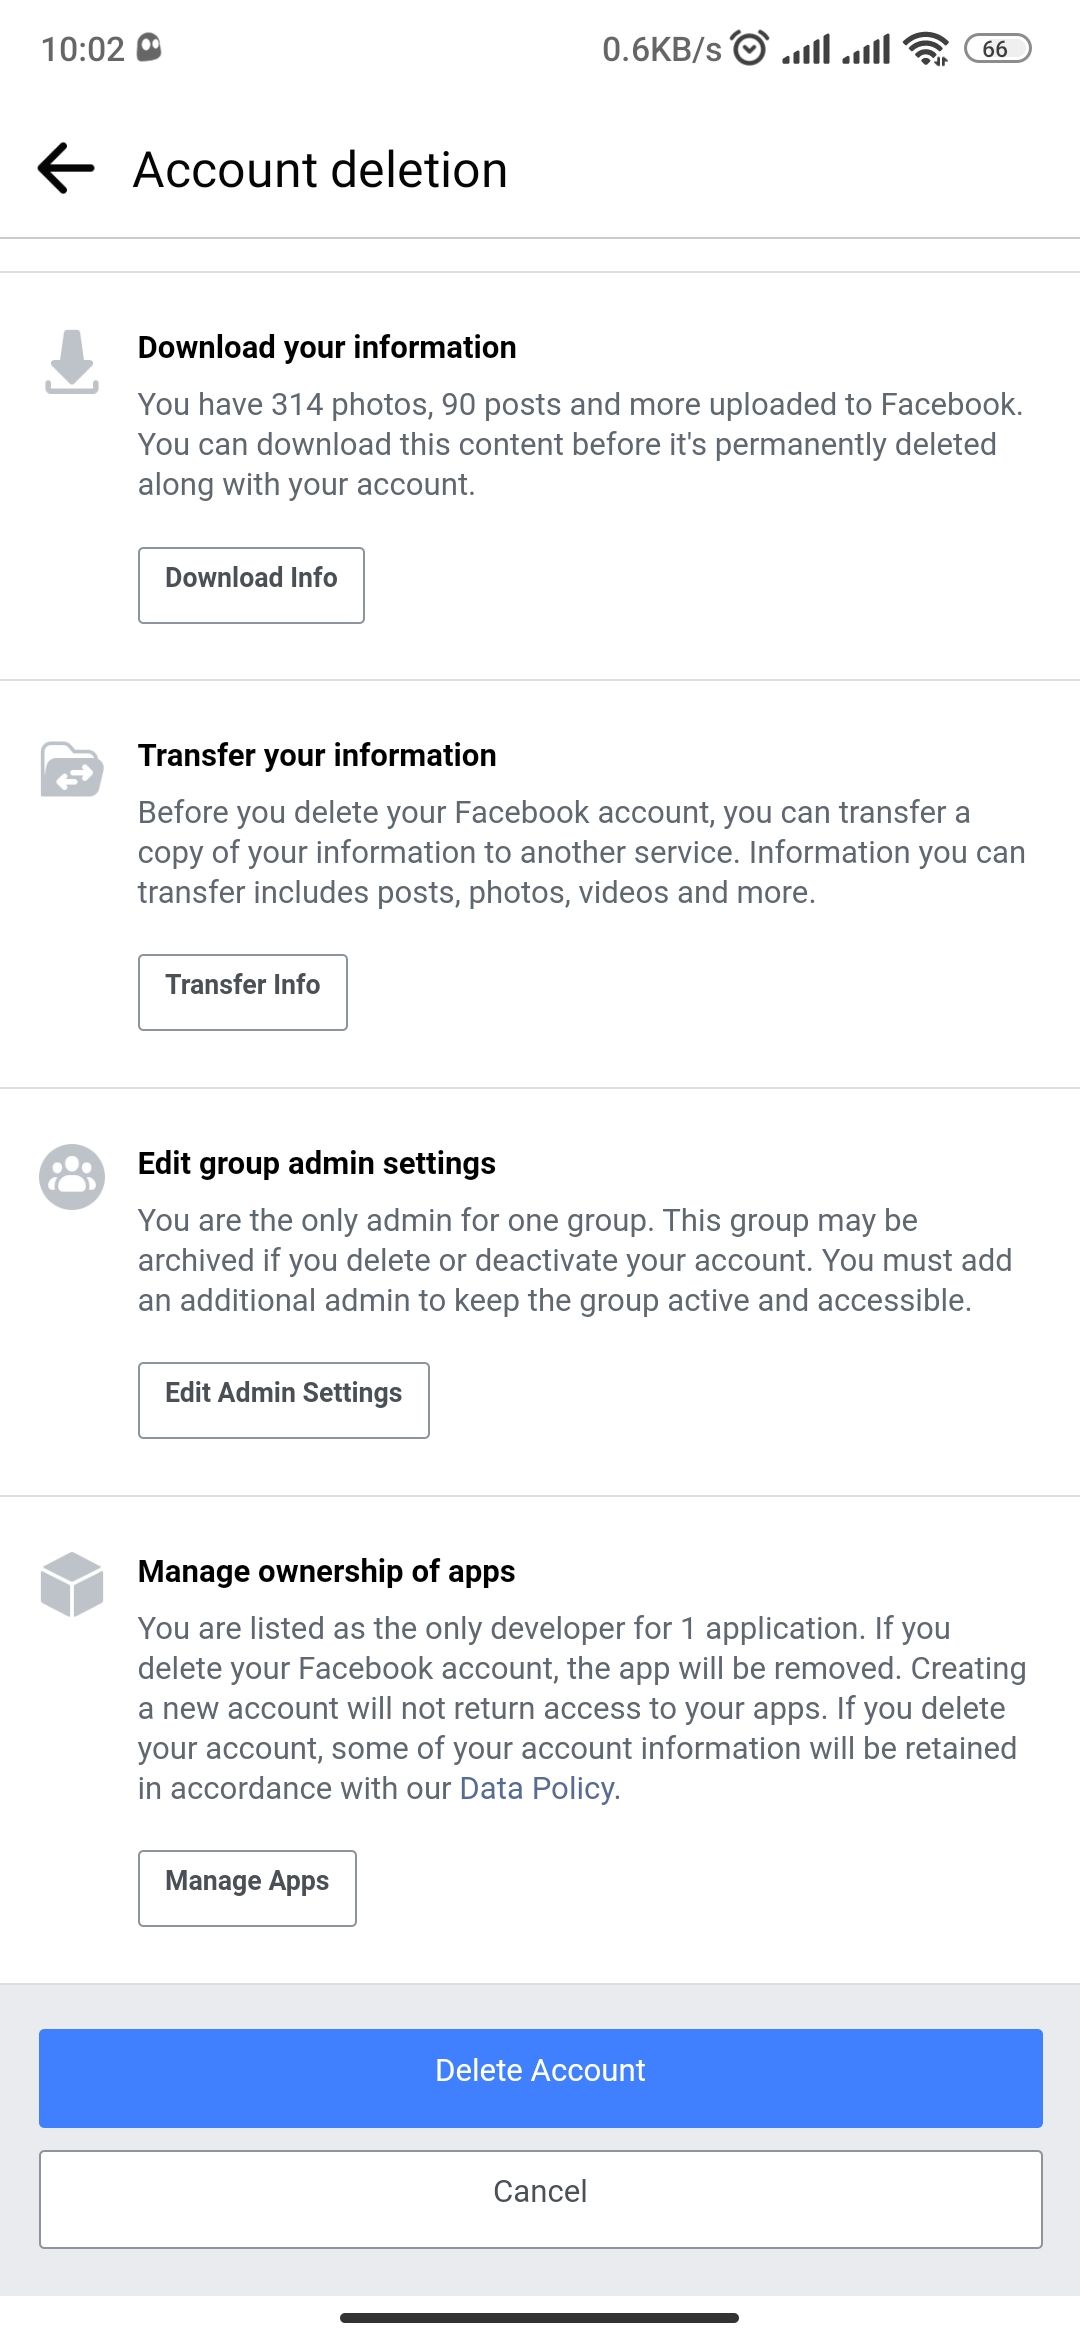
- Select Delete Account and then click on Continue to Account Deletion.
- Follow the on-screen instructions to confirm your account deletion.
Step 3: Confirming Account Deletion
After confirming your intent to delete your account, Facebook will initiate the process. Note that:
- Your account will not be permanently deleted immediately. Facebook provides a 30-day grace period to change your mind.
- If you log back in during this time, you can cancel the deletion and restore your account.
Considerations Before Deleting Your Facebook Account
As you consider deleting your account, be aware of the implications:
- Once your account is deleted permanently, you won’t be able to retrieve any of your data.
- Any pages or groups you manage will also be lost unless you transfer management to another user.
- Friend connections, events, and message history will be erased.
Alternative: Deactivate Your Account
If you’re unsure about permanently deleting your account, consider deactivating it. This will hide your profile and all associated information without permanent loss:
- Go to Settings.
- Select Deactivation and Deletion.
- Click on Deactivate Account and follow the prompts.
Deactivating allows you to return whenever you wish, as all your information will be saved.
Conclusion
Deleting your Facebook account is a significant decision that comes with its own set of advantages and disadvantages. Whether you choose to delete or deactivate your account, it’s vital to make an informed choice that aligns with your personal values and needs. The steps outlined here will guide you through the process, ensuring you reclaim your online space or take a break from social media as needed.
For additional guidance and details on the account deletion process, visit this How to Delete a Facebook Account Without Access https://crazyfb.shop/en/page/kak-udalit-akkaunt-v-facebook-esli-net-dostupa.